Stellar Sovereigns is a surprisingly complex and engaging 4X title from one-person indie developer Imagined Reality. Although it has an intensive tutorial system that explains many game mechanics, there’s still a lot left up to the player to learn through trial and error. Hopefully, this guide will give you a head start from my various trials and errors of learning to play the game. Let’s start out with a few steps that will make life a bit easier.
First Steps
First of all, get your mining fleet upgraded at the start. You’ll want to add in mining sensors, both drone slots and both shuttle slots as well as two mining barges once you have funds. This will take a few turns to finish, but it’ll help you immensely in the early game by allowing you to gather resources from systems much more quickly. Depending on your start, you may want to get a second mining fleet built up. It can be helpful as the game progresses to have one fleet that can reroute to collect salvage, or stagger their movement between systems, to keep a steady flow of rare resources.

Second, you should consider going tall for the early game rather than going wide since you can. It’s possible to be successful either way, but for a new player, it’ll be much easier to see the impact of your decisions, and how different mechanics interact with just a colony or two, rather than with twenty. Just be careful to watch the EV factors on planets you’re looking to colonize because those are more than just labels. They foreshadow the types of natural disasters that can randomly befall a colony damaging your sectors and killing your population. You’ll probably also want to set the governor to 100% plus on your first colony, to handle the sector’s demands while you learn what it’s doing. Just don’t do that on your homeworld as it’ll expend all your income. Twenty percent or so is fine, and it’ll only use that money when it needs to expand a sector, so it’s not a constant drain.
Finally, you start with a trade station at your homeworld. Use that to set up a trade route with your first colony (and don’t forget to assign a transport). These routes don’t generate a lot of income early game but with low tariffs, they do generate plenty of positive approval as long as you build enough transports to fulfill demand. It’s also important to get trade routes looping through your colonies because you can only transfer resources as long as there’s a route with enough capacity between worlds. Make sure you protect them with a fleet or pull your transports off the route if you see a pirate fleet inbound. Pirates don’t just reduce resource flow, they outright destroy any transports they catch and won’t leave until you force them to.

Learning to Fight
Stellar Sovereigns doesn’t give you a lot of warning before throwing you into combat and there’s no undo button. Since it can be tough to replace your starting fleet if you lose it to a pirate ambush, take some time to learn about how to fight in the testing ground you can access for each ship through the sextant icon in the fleet screen. Before you do, here’s a primer on combat.
Picking Ships
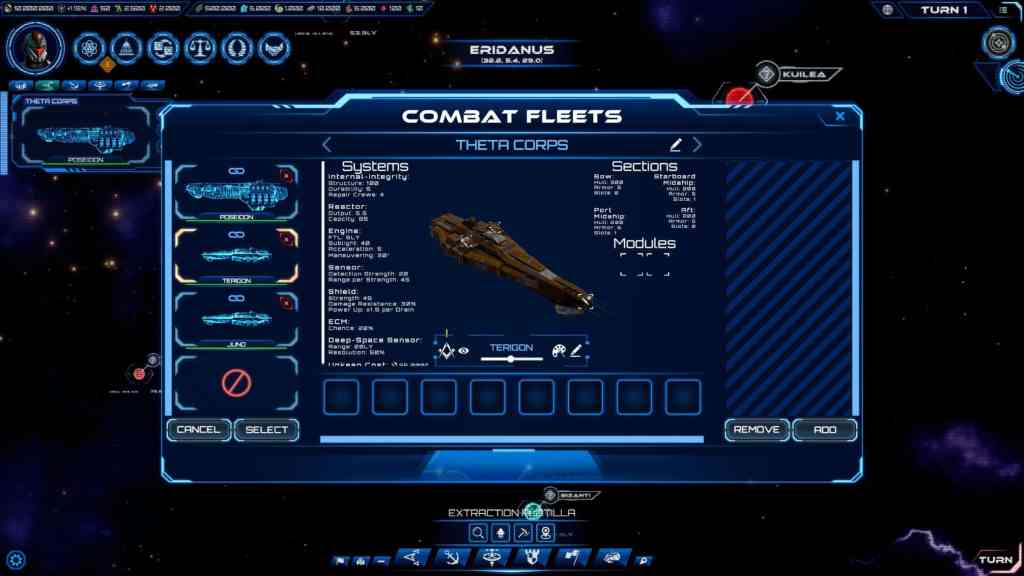
Ship selection matters so you need to pick ships that will work well together. This can be hard since the game lets you take any ship combination as your starting fleet, and the differences that do really matter aren’t obvious. Some ships, like the cruiser and carrier, take more experience to get the most out of them. Ships that work well together tend to have similar speed and maneuverability. Likewise, taking a less durable capital ship means you’ll need to focus on heavier escorts, or keeping it moving to avoid damage.

Capital ships are the core of every fleet. These provide the heaviest firepower and most durability when compared to most escorts. There’s a lot of variety here with Assault Cruisers getting torpedoes and more troop capacity, while Cruisers have a high missile compliment that can be devastating combined with their micro-jump drive. Different capital ships have different uses, and I’d recommend testing each one out to see what works best for you. Usually, a Dreadnought or Battleship is a good selection for a new player because they are fairly durable and have good firepower to knock down enemy shields or punch through armor.
Each fleet has two additional slots for escorts. Early game, it’s probably worth building these as singles just to get more fleets out to explore the galaxy, but as you fill out the fleets, keep in mind how the fleet will function together. Destroyers are heavy hitters with slower maneuvering and high durability. Corvettes are fairly middle-of-the-road, but have a good weapon combination for hammering shields and armor. The last two options are the most focused: Frigates mount a torpedo and are excellent standoff units, especially with ionic weapons to disable ships, while Missile Boats are the weakest of the escorts and will die quickly when shot at, but if you keep them alive, their missile volleys are deadly to armor. Which ones you pick will depend on your overall fleet goals.
Two good options for your starting fleet are a battleship and two frigates or a dreadnought with a destroyer and a missile boat. This works by using the battleship or dreadnought as the primary target for enemy firepower letting the frigates hit with torpedoes or the missile boat volleying fire into a ship once shields drop.
Combat Mechanics
Once you have a fleet selected, you need to understand the mechanics of how combat works or you will very quickly find yourself without a fleet. These mechanics are deceptively simple looking when combat starts but are a challenge to manage effectively. At the most basic level, each ship produces a certain amount of power and has shields, hulls, and structure. Once the shield and hull is defeated, you can do damage to the ship’s structure, eventually destroying the ship when it hits zero.
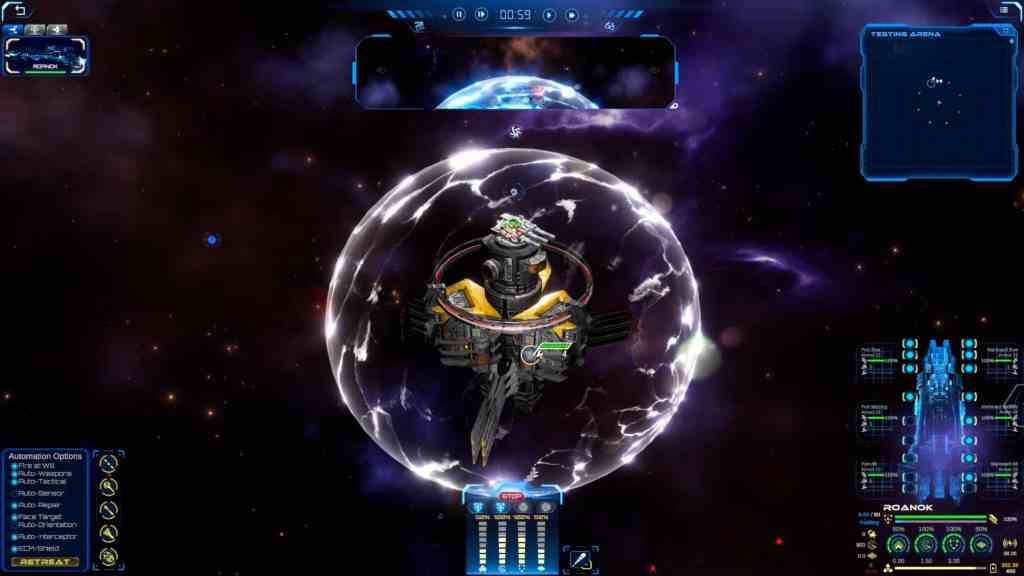
Shields are the first line of defense for a ship, and they require power to raise. Once up, no power is needed to maintain them, but as you take hits, power is used to increase the rate of recharge. If damage comes in faster than a shield can be charged, it will fail and require you to charge it fully before it comes back up. Shields aren’t absolute blockers of damage either. Each ship has a different total shield strength and percentage of damage blocked by the shield. Some weapons will also bypass a shield, so keep an eye on your hull when taking fire.
Hull is the second line of defense. Each ship is broken up into sections with its own hull value and armor rating. Larger capital ships might have six zones while defenses may have as few as one. These are represented as concentric rings around each ship: as you take hits, hull zones will take damage with the total damage being reduced by the armor strength. Once a zone reaches zero hull, you’ll be alerted to a hull breach, and while you can repair hulls in combat, a hull breach usually warrants emergency maneuvering to present a different section to the enemy while the ship escapes. Escorts especially can be destroyed in seconds after a breach, so pause as soon as you see a breach and evaluate the situation.

The structure is the green health bar over a ship and is its final defense. Once a ship takes damage here you will be susceptible to degradation damage effects. These effects are permanent modifiers to a ship, like reduced power output, broken sensors, or damaged engines, that can only be cleared by returning to a shipyard and paying to have the damage fixed. Be careful to expose your structure as little as possible in combat.
The final region you can target on a ship is the turrets. Shooting at these won’t contribute to destroying an enemy ship but taking out particularly destructive turrets can help to shift the balance of power in a match, especially if you’re outnumbered. Don’t make it a priority, but also don’t forget it’s an option.
While it’s important to know the mechanics of how ships take damage in combat, one of the core areas you’ll need to understand to be successful in combat is power management. Everything on your ships uses power, from shields, engines, and sensors, to weapons. Each ship has a limited power generation capacity and a reserve battery for when there isn’t enough available. This is mostly easy to understand: increase power to engines and your ships will move faster, decrease the power and they move slower. Add power to shields and they charge faster, but drain more power when they do, and this holds true for sensors and ECM as well.
Weapons are slightly different: all of your weapons draw from a unified energy pool of what is left after the power goes to all your other systems and each weapon will need to fully charge before it can fire. This means that the more weapons you have active the longer they will take to charge and fire, as energy is split between charging all of them. Keep an eye on where your enemy is and only activate weapons that will hit your target. Any weapon you turn off will drain stored power back into other systems. This is especially useful to drain weapon power when your shields are breached and it’s important to get them back up as quickly as possible.
Combat Management
When combat begins, you’ll be given a timer. This defaults to six minutes but you can choose longer or shorter intervals when you create a game. The total time available varies based on how far through the turn the fleet arrives. You can roughly tell by looking at the ETA for a fleet in the Destinations view. If the total travel time has a decimal value, that value will be used to determine how much of the full combat time you’ll get. When combat begins, you’ll have until you unpause to see where enemy ships start in relation to your ships. This is incredibly helpful and gives you an initial vector to head towards.
Once you have an idea of where to go, it’s time to set up your fleet automation. Although the game doesn’t have any way to automate movement of your ships, the options available are quite helpful for keeping things manageable. For most combat, you can leave the defaults in place. The options we’ll focus on are Fire at Will, Auto-Weapons, and Auto-Tactical.
By default, Auto-Weapons is active and automates toggling turrets off and on based on which turrets have range and firing arc on your selected target. Using this option as you learn to manage your ships means that they will handle making sure they can fire at the target you pick. Auto-Weapons will display a weapon list for you to select which weapons you want to be handled automatically. Any type you toggle off will require you to manually activate to fire them.
The second option is Auto-Tactical. This one is off by default, but if you don’t plan to manage a ship directly, you should enable it. Auto-Tactical allows your ships to manage charging and firing of their tactical weapons or special abilities without your input. You’ll still need to give specific targets but once you’ve set a target, the ship will use every weapon and ability against it.
The last option to look at is Fire at Will. When enabled, your ships will fire at any target in range automatically so you don’t have to set a target for them. It can be helpful in bigger battles where you may not want to micromanage every group. You’ll also see the weapon panel from Auto-Weapons. Toggling a weapon type off here will force it to only fire on ships you explicitly target.
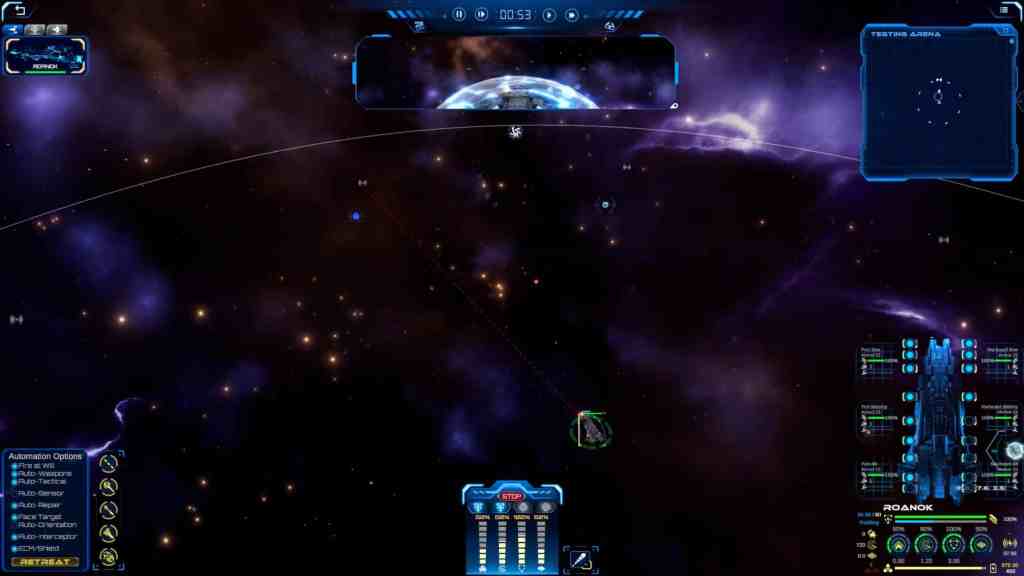
As your ships close to engage the enemy in combat, sensors are important beyond just finding where the enemy is. Ships at the edge of your sensor range show up only as sensor contacts, and you won’t have any additional information about these ships other than speed and heading. As they get closer they will be identified, giving you more information about the specific ship.
The more power you put into sensors the farther out you’ll identify enemy ships. Inversely, no power to sensors means targets within weapon range will not be detected and you’ll lose the ability to target them or shoot at them. Your ships share sensor data so as long as one ship has enough power to identify enemy vessels, any ship can target them. This can be useful to gain extra power for your front-line vessels to keep their shields up under heavy fire.

How Research Works
Research in Stellar Sovereigns works differently than most 4X games and is influenced by many factors. The basic principles for research are that each tech costs a certain number of points and you pay for those points with credits each turn. The more points you buy, the faster you research a tech. However, put in more than 100% it will become increasingly likely that you’ll have a research accident resulting in lost progress, or even resetting your progress entirely.
Keeping these basics in mind, there are many things that will influence your progression. First of all, research costs per point are variable. Traits can reduce the cost of techs and your government type will determine the base cost per research point. Further, your specific placement on the political chart will change the costs as you move toward different extremes. Ensure that a change in government or unlocking a helpful trait doesn’t affect your budget and force you to cut back on your research investments: it may not seem like a lot initially, but the costs can shift dramatically on higher tier techs.
The second thing to understand is how the research bonus works. The research bonus is what serves to increase your research speed, but isn’t actually a direct cost modifier. The bonus is derived from the R&D sector size on each planet and the empire’s scientific aptitude score. It can be boosted by research stations and sector buildings. Research stations give you the bonus found in the system view plus 5%, and can be increased by 1% per lab aboard the station.

The total research bonus of all your colonies, plus things like research pacts with other empires, is listed in the resource bar for your empire. This bonus is applied as a percentage boost to the research points purchased for each tech. For example, if you invest 100 points and your research bonus is 10%, you’ll get ten points per turn added without extra cost or risk.
Finally, it’s useful to know that the total percentages you can invest to fund a tech don’t change with the tech level, but the number of points purchased for the same percentage investment does change. This means a level three tech can be vastly more expensive to fund at 100% than a level one tech. Beyond this, managing research is mostly a matter of deciding how much of your budget you can invest, and adjusting spending for each tech you want to research.
Colony Chaos
While the controls provided for managing a colony are fairly straightforward, managing colonies well is a daunting prospect. As a new player, it’s best to just turn on the planetary governor by giving it a budget and watching what it does each turn. As you learn more about the game, you’ll want to manage some colonies yourself. To do that you’ll need to know the mechanics that drive colony growth.
Back to the Basics
Each planet in Stellar Sovereigns has a base factor for the planet class and a variety of traits that impact the suitability of the planet for colonization. These values affect the capabilities of each sector under player control: Industry, Housing, Agriculture, and Research. Each sector has three different buildings you can select from, but can only have one built at a time and these buildings can be upgraded two times. Each turn you’ll modify how much of your colony tax income goes toward building development in each sector. The cost for each unit of development is based on your government type and modified by EV factors on the planet, as well as research and traits. How much development a colony can do each turn is limited by the capacity of the Industry sector. Your job is to balance the needs of each sector to grow the population and better extract resources on the planet.
Building Up from Nothing
Once you’ve picked a planet to build a colony on and your colony ship has dropped off the newly defrosted citizens, you need the colony to grow. Because your minimum Industry levels for colonization will provide you with plenty of jobs, your first two hurdles are going to be housing and food.

Both are pretty straightforward. You need one unit of food and housing for each person on the planet and if you don’t have enough your population will stagnate or shrink. You may even trigger demonstrations and outright revolts if your approval drops too much.
How you get food is going to be up to the planet you colonized. Planets with high negative EV and low production per agriculture unit will need specialized buildings, or even food imports, to free up your population for other sectors. It’s also worth noting that planets have a wide range of “consumables”, extracted like resources, that count toward both approval boosts and food totals for the planet.
With housing, you need enough to house your current population and the expected population growth. It may sound difficult, but the game provides a tooltip on the housing sector to indicate the projected growth you’ll have to cover next turn. However, it’s not always advisable to ensure comfortable housing is available for the entire population.
As more people fit into the same space, you’ll start to take an approval malus for overcrowding. Overcrowding is a primary driver of people looking to move to other worlds as Pioneers, so it can be helpful if you need colonists. Take it too far and you’ll get demonstrations and eventually population stagnation.
Jobs. Jobs. Jobs.
Once you’ve got food and housing handled, the next hurdle is having enough employment for the population. There are two reasons to ensure high employment levels: the first is that an unemployed citizen won’t be providing you with tax income or helping to create the resources you need to drive your economy. The second is that your government pays each unemployed citizen an unemployment stipend at a rate determined by your government type. It’s not all bad because increased unemployment boosts military recruitment rates.

Most of the time, you’ll get the jobs you need by investing in the Industry and Research sectors on the planet, but it’s worth noting that increasing your agriculture segment will also create jobs for your citizens. On the surface, this sounds like all you need to do is max out your investments to ensure you’ll always have the capacity as your population grows. This is a mistake because having too many jobs, and too few workers, results in underutilization that reduce the productivity of the affected sector in relation to the number of unused jobs.
Each sector also has a small number in the lower left corner. This number represents the order in which your population will fill the available jobs, and can be shifted around at will. It’s a bit of an awkward ordering system, so just pick one sector and click the number until the order you want comes up. Be warned, if you are short on workers, you can end up short on food if you put those workers into Industry and Research before Agriculture.
Resources and Why You Don’t Have Them
There are many resources to worry about in Stellar Sovereigns. Beyond the seven basic construction resources, planets have a range of additional consumables, drugs and substances, precious metals, and stones to extract and exploit. Knowing what you need and where to get those resources is usually quite clear. However, outside of buying them in the market or extracting them using mining fleets, understanding how your colonies produce your resources can be more opaque.

Let’s start with the basics of how resources are made. Each unit of development in a sector counts toward the extraction of a resource. When you hover over that resource on a colonized planet or a potential colony you’ll see the rate of extraction for the planet. This can vary, so some planets will be better at producing the same resource. For example, a common rate is 1:1 of Structural Composite to Industry. This means that for every unit of Industry you have, you will create one unit of Structural Composite. If you have a bonus to Extraction from traits or other factors that will be added on top, for instance, 1,000 Industry in our previous example with a 10% bonus will net a total of 1,100 structural composite units per turn. This formula applies to all resources present on the planet, but resource extraction is controlled by different sectors based on the resource type.
One final piece to touch on here is that your Industry will also produce trade goods for transport to domestic colonies and foreign empires. The total trade goods created is controlled by your resource extraction rate and converted at a fixed rate detailed in the resource tooltip. This is an entirely different thing than resource production on planets so don’t be confused. This conversion rate is constant across each resource type and only matters for supplying consumer demand on trade routes.
Conclusion
The complexity of managing an empire in Stellar Sovereigns can be overwhelming at first because systems interlock in sometimes opaque ways. Once you understand how those systems work, managing your empire can be a rewarding experience. While this guide doesn’t delve fully into the nuances of these systems, hopefully, it will give you a place to start and help you better understand the game mechanics.